Appearance
SpringBoot3教程 - 5 配置文件
前面在使用 Spring Initializr 创建项目的时候,在 resources 目录下已经创建了项目的全局配置文件 application.properties 。
如果使用手动的方式创建项目,则需要手动创建全局配置文件。
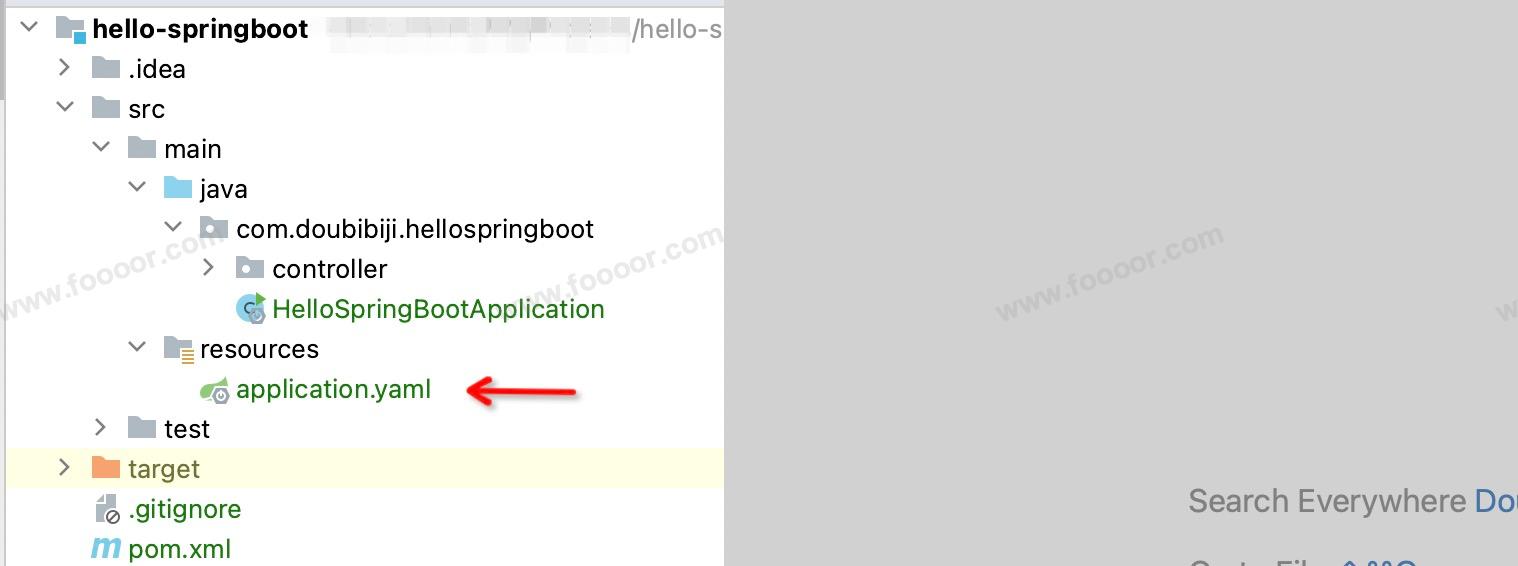
首先在 src/main/ 目录下创建 resources 文件夹,然后右键 resources --> Make Directory as --> Resources Root,将 resources 设置为资源目录,然后在 resources 目录下创建 application.properties 或者 application.yaml 。
5.1 配置文件的格式
SpringBoot 全局配置文件有两种文件格式:
application.propertiesapplication.yaml或者application.yml,两种后缀名是一样的
一般更倾向于使用 application.yaml ,用一段 spring 数据源配置,比较一下这两者的区别:
application.properties
properties
spring.datasource.url=jdbc:mysql://localhost:3306/test-db
spring.datasource.username=root
spring.datasource.password=123456
application.yaml
yaml
spring:
  datasource:
    url: jdbc:mysql://localhost:3306/test-db
    username: root
    password: 123456
相比较于properties文件,yaml文件支持层级,通过一级的属性就知道下面是什么配置,可读性更好,而且可以支持复杂的数据结构(如列表、多层级嵌套映射等)。
5.2 YAML语法简介
YAML (Yet Another Markup Language) 是一种专注于数据序列化的简洁而易读的格式。常用语配置文件,比XML更简单、直观。
YAML语法的特点:
缩进: YAML 使用缩进表示层级关系。缩进通常使用空格,缩进的数量只要一致即可,通常每层缩进 2 个或 4 个空格。
键值对: YAML 使用键值对来表示数据,格式为 key: value。冒号后面必须有一个空格。
列表: 列表项使用连字符(-)加空格表示,所有项应在同一级别的缩进下。
注释: 注释使用 # 开头,注释可以放在行的任何位置。
字符串: 字符串通常不需要引号,除非字符串包含特殊字符或需要保留空格。单引号和双引号都可以使用,使用单引号,不会转义字符串里面的特殊字符,特殊字符会作为本身想表示的意思;使用双引号会转义特殊字符,特殊字符最终只是普通的字符串数据。
yaml
name: "zhangsan \n lisi"  # 输出:zhangsan 换行 lisi
name: 'zhangsan \n lisi'  # 输出:zhangsan \n lisi
多行字符串: 可以使用 | 或 > 来表示多行字符串,其中 | 保留换行符,而 > 折叠换行符。
举个栗子:
yaml
person:
  name: niubi
  age: 30
  hobbies:  # 列表
    - reading
    - hiking
    - coding
  birthday:  # 支持多级嵌套
    year: 2024
    month: 6
    day: 8

student:
  name: doubi
  age: 18
  languages: [Python, JavaScript, YAML]  # 也是列表,行内写法,更紧凑易读
  birthday: {year: 2024, month: 6, day: 8}  # 子级的行内写法
5.3 修改项目端口
现在知道 application.properties 或 application.yaml 是项目的全局配置文件了,但是这两个文件使用一个就可以了,不要两个同时存在,否则不同版本的 SpringBoot 在处理的时候,优先级可能不同,导致出现不必要的麻烦。
后面我都使用 application.yaml 。
SpringBoot 默认是使用 Tomcat 作为内置服务器的,所以默认使用的是 8080 端口。下面修改 application.yaml ,来修改项目的端口。
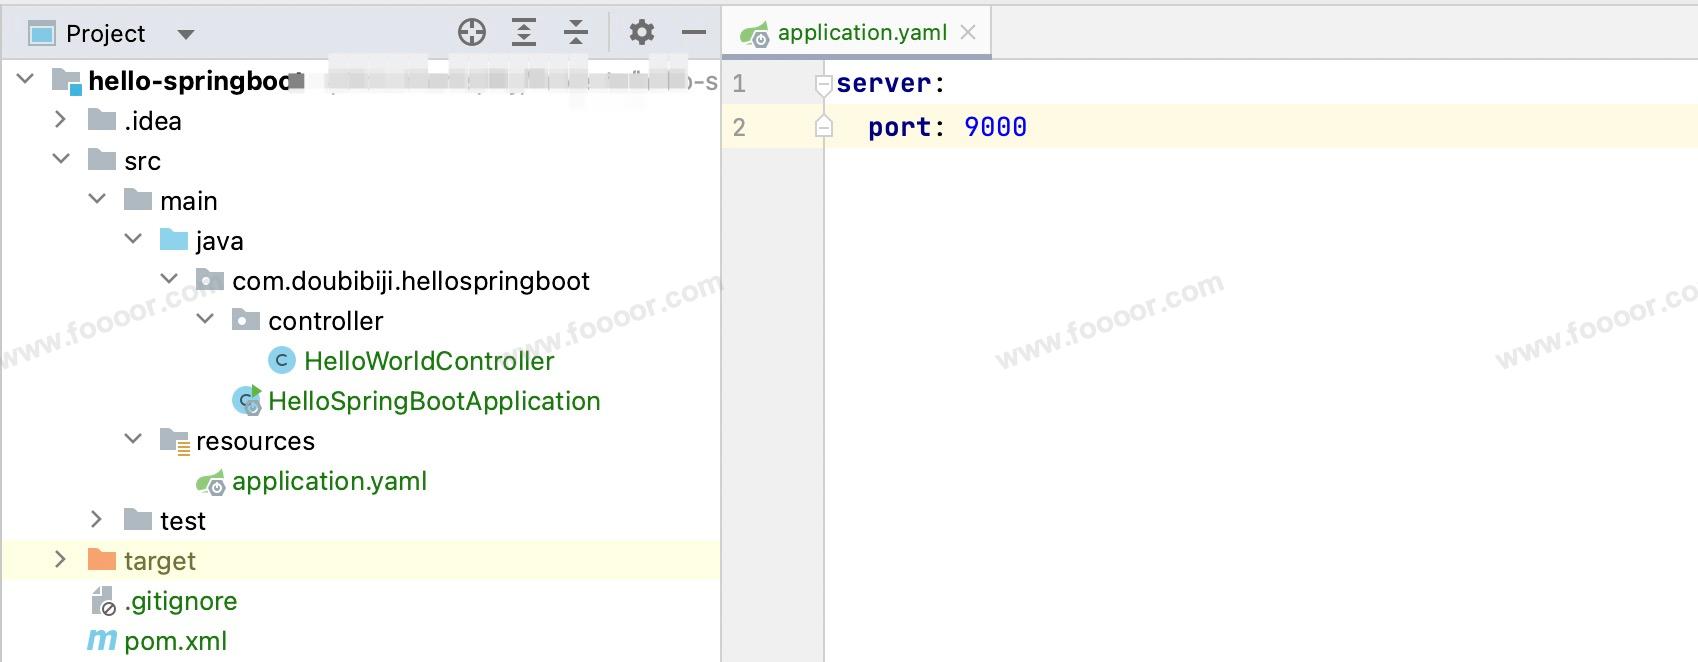
编辑application.yaml 内容如下,修改项目的端口为 9000:
yaml
server:
  port: 9000
项目结构如下:
启动项目并访问 http://localhost:9000/hello ,发现访问没问题!
5.4 配置文件的加载顺序
SpringBoot 的默认配置文件是放在 resources 目录下,SpringBoot启动后会找到 application.properties 或 application.yml 文件作为 SpringBoot 的默认配置文件。
其实 SpringBoot 还会扫描以下位置的 application.properties 或 application.yml 作为默认配置文件。
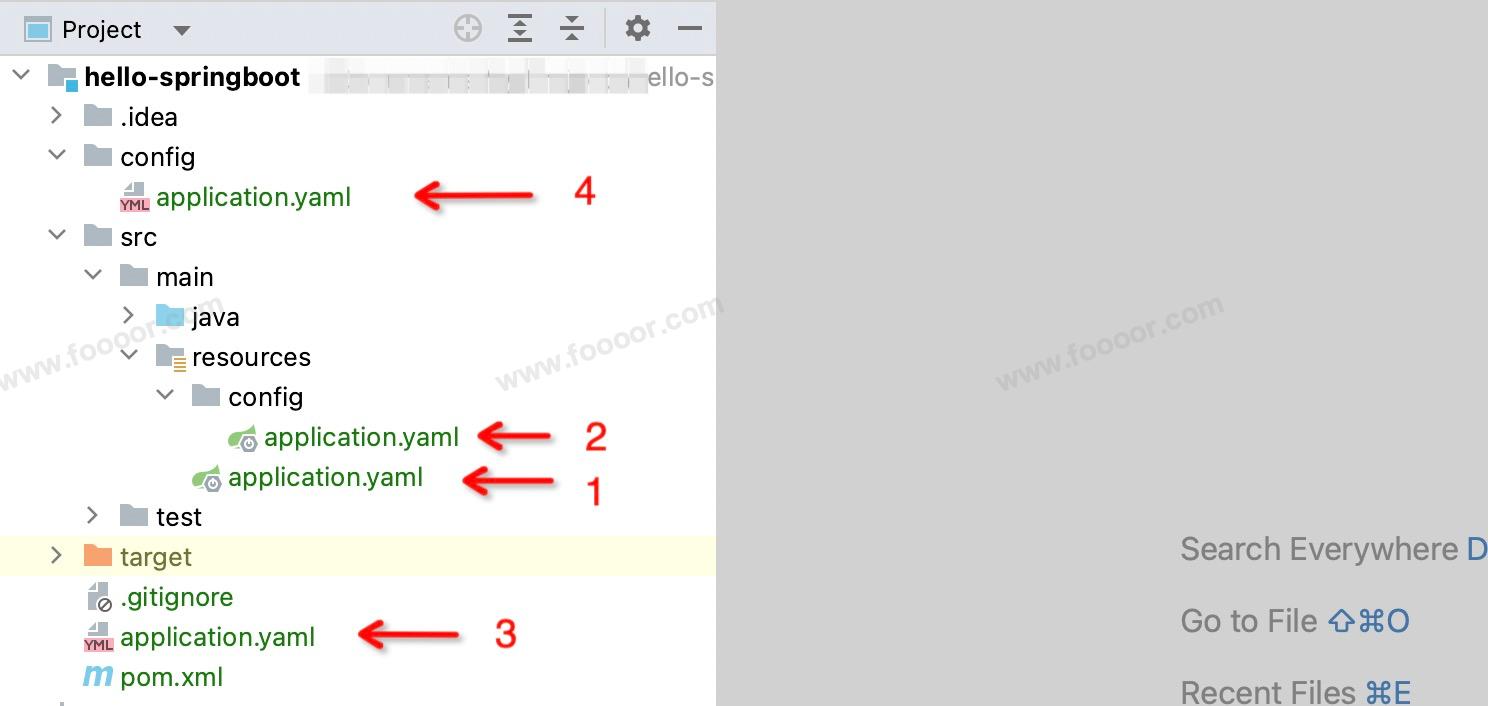
优先级由低到高:
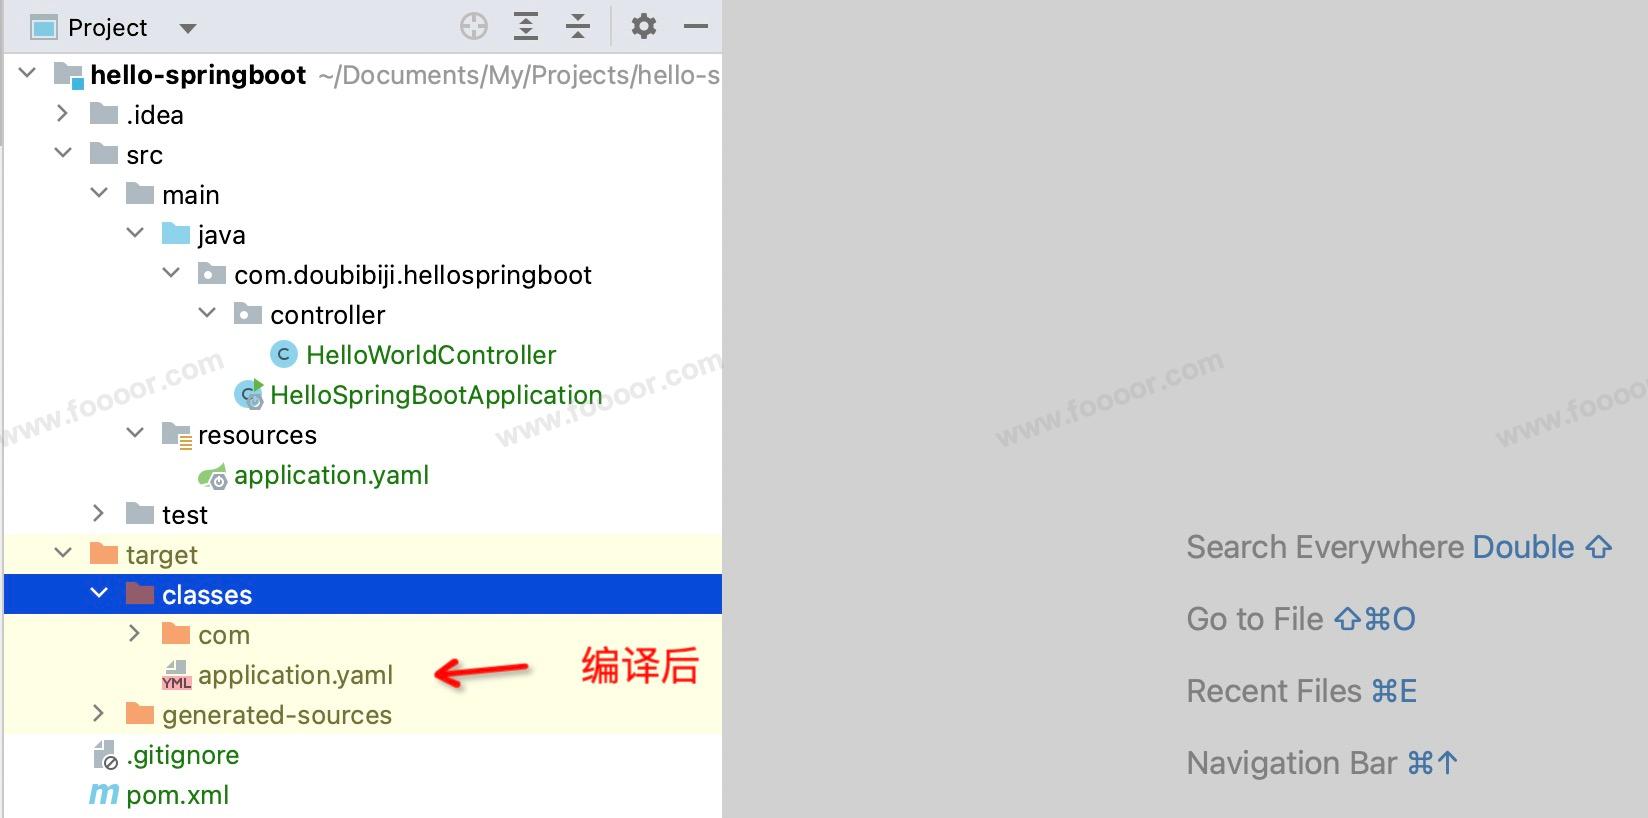
- classpath根目录下的,也就是 resources 目录下的,resources 下的内容,编译后就在类路径下。也就是说 resources 下的 application.yml 加载的优先级最低,但是我们一般还是将配置文件放在这里,下面的几种方式很少用。
- classpath根目录下的config文件夹下(很少用)
- 项目根目录(很少用)
- 项目根目录下的config(很少用)
- 命令中指定配置文件路径(有时用,待会解释)
文件的位置如下:
上面所有位置的文件都会被加载,优先级高的配置文件中的条目会覆盖优先级低的文件配置的条目,各个配置文件都是 application.yaml 或 application.properties 名称。各个配置文件中的配置可以形成互补,有些配置文件放在高优先级的配置文件中,有一些配置可以放在低优先级的配置文件中。
但是在打jar包的时候,只会打包类路径src目录下的内容,所以只会打包 resources 根目录下及其子目录 config 目录下的 application.yaml 配置文件,其他的不会打包在内,因为不符合maven的目录结构,所以在运行jar包的时候无效。
解释一下第5种,我们在使用 java -jar 命令运行 jar 包的时候,可以直接指定配置,这个配置的优先级是最高的:
shell
# 运行的时候,指定项目端口
java -jar hello-springboot-1.0-SNAPSHOT.jar --server.port=8888

# 运行的时候,指定application.yaml配置文件的路径
java -jar hello-springboot-1.0-SNAPSHOT.jar --spring.config.location=D:\config\application.yaml
5.5 多环境配置文件
在实际的开发中,我们会针对不同的环境(例如开发、测试、生产)有不同的配置,例如不同环境使用不同的数据库等。
SpringBoot支持针对不同环境定义不同的配置文件。
1 定义多Profile文件
在编写配置文件的时候,可以添加后缀,文件名可以是 application-${profile}.properties/yaml
举个栗子:
shell
# 可以使用properties后缀
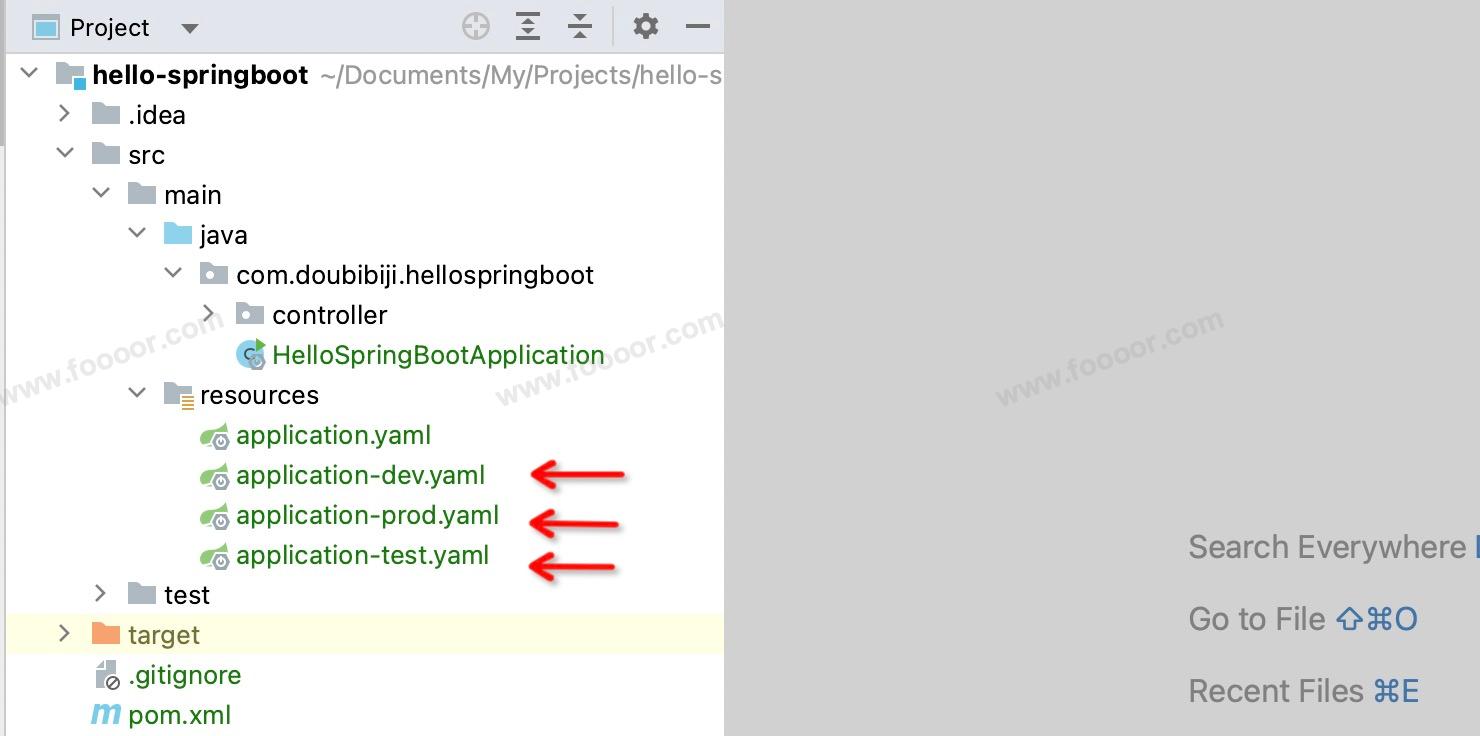
application-dev.yaml
appliaction-test.yaml
application-prod.yaml后缀 dev 、 test 、 prod 也不是固定的,自己定义,但是上面的定义清晰明了,一看就为哪个环境准备的。
2 激活配置文件
默认 SpringBoot 启动,只会加载 application.yaml 中的内容,如何指定加载其他的配置文件呢?
我们将服务器的端口配置分别在 dev 、 prod 、 test,分别进行配置,也就是测试一下不同的环境使用不同的端口。
application-dev.yaml
yaml
server:
  port: 9000
application-test.yaml
yaml
server:
  port: 9001
application-prod.yaml
yaml
server:
  port: 9002
然后在 application.yaml 中配置如下:
yaml
spring:
  profiles:
    active: dev  # 指定加载application-dev.yaml
3 启动并测试
启动项目,发现项目端口使用的是9000,即使用的是application-dev.yaml 中的配置。
同样修改 application.yaml 中的 spring.profiles.active 的值为 test 或 prod 会加载对应文件中的配置,使用对应的端口。
4 加载多个配置文件
在实际的开发中,我们可以将各个环境通用的配置放到 application.yaml 中,将不同环境的配置分别定义到对应的环境的配置文件中,然后在 application.yaml 中的修改 spring.profiles.active 的值来加载对应环境的配置文件。
有时候各个环境通用的配置比较多,都放在 application.yaml 中很臃肿,我们也可以多定义几个配置文件, application.yaml 中的 spring.profiles.active 的值是可以指定多个的。
例如我定义了 application-quartz.yaml ,我想 SpringBoot 启动的时候加载 application-prod.yaml 和 application-quartz.yaml ,可以指定 spring.profiles.active=prod,quartz :
yaml
spring:
  profiles:
    active: prod,quartz  # 指定加载application-dev.yaml
5 命令行指定配置文件
在使用命令行运行 jar 包的时候,可以通过参数指定使用哪个配置文件:
shell
# 指定加载application-test.yaml
java -jar hello-springboot-1.0-SNAPSHOT.jar --spring.profiles.active=test
5.6 配置注入Bean
为了便于测试,在项目中导入 SpringBoot 测试相关的依赖:
xml
<dependency>
  <groupId>org.springframework.boot</groupId>
  <artifactId>spring-boot-starter-test</artifactId>
  <scope>test</scope>
</dependency>
并新建一个测试类:

下面讲解一下如何在 Bean 中获取到 application.yaml 文件中的配置:
application.yaml 内容如下:
yaml
server:
  domain: www.doubibiji.com
编写测试类 HelloSpringbootApplicationTests.java 内容如下:
使用 @Value 注解将 application.yaml 中的配置,使用 key 注入到 Bean 中。
java
package com.doubibiji.hellospringboot;

import org.junit.jupiter.api.Test;
import org.springframework.beans.factory.annotation.Value;
import org.springframework.boot.test.context.SpringBootTest;

@SpringBootTest
class HelloSpringbootApplicationTests {

	@Value("${server.domain}")
	private String domain;

	@Test
	void contextLoads() {
		System.out.println("domain:" + domain);
	}
}
测试类也相当于一个 Bean,在实际的使用中,使用同样的方式,可以将配置注入到 Controller 、Service 中。
运行测试方法,可以看到获取到了 domain 的值。
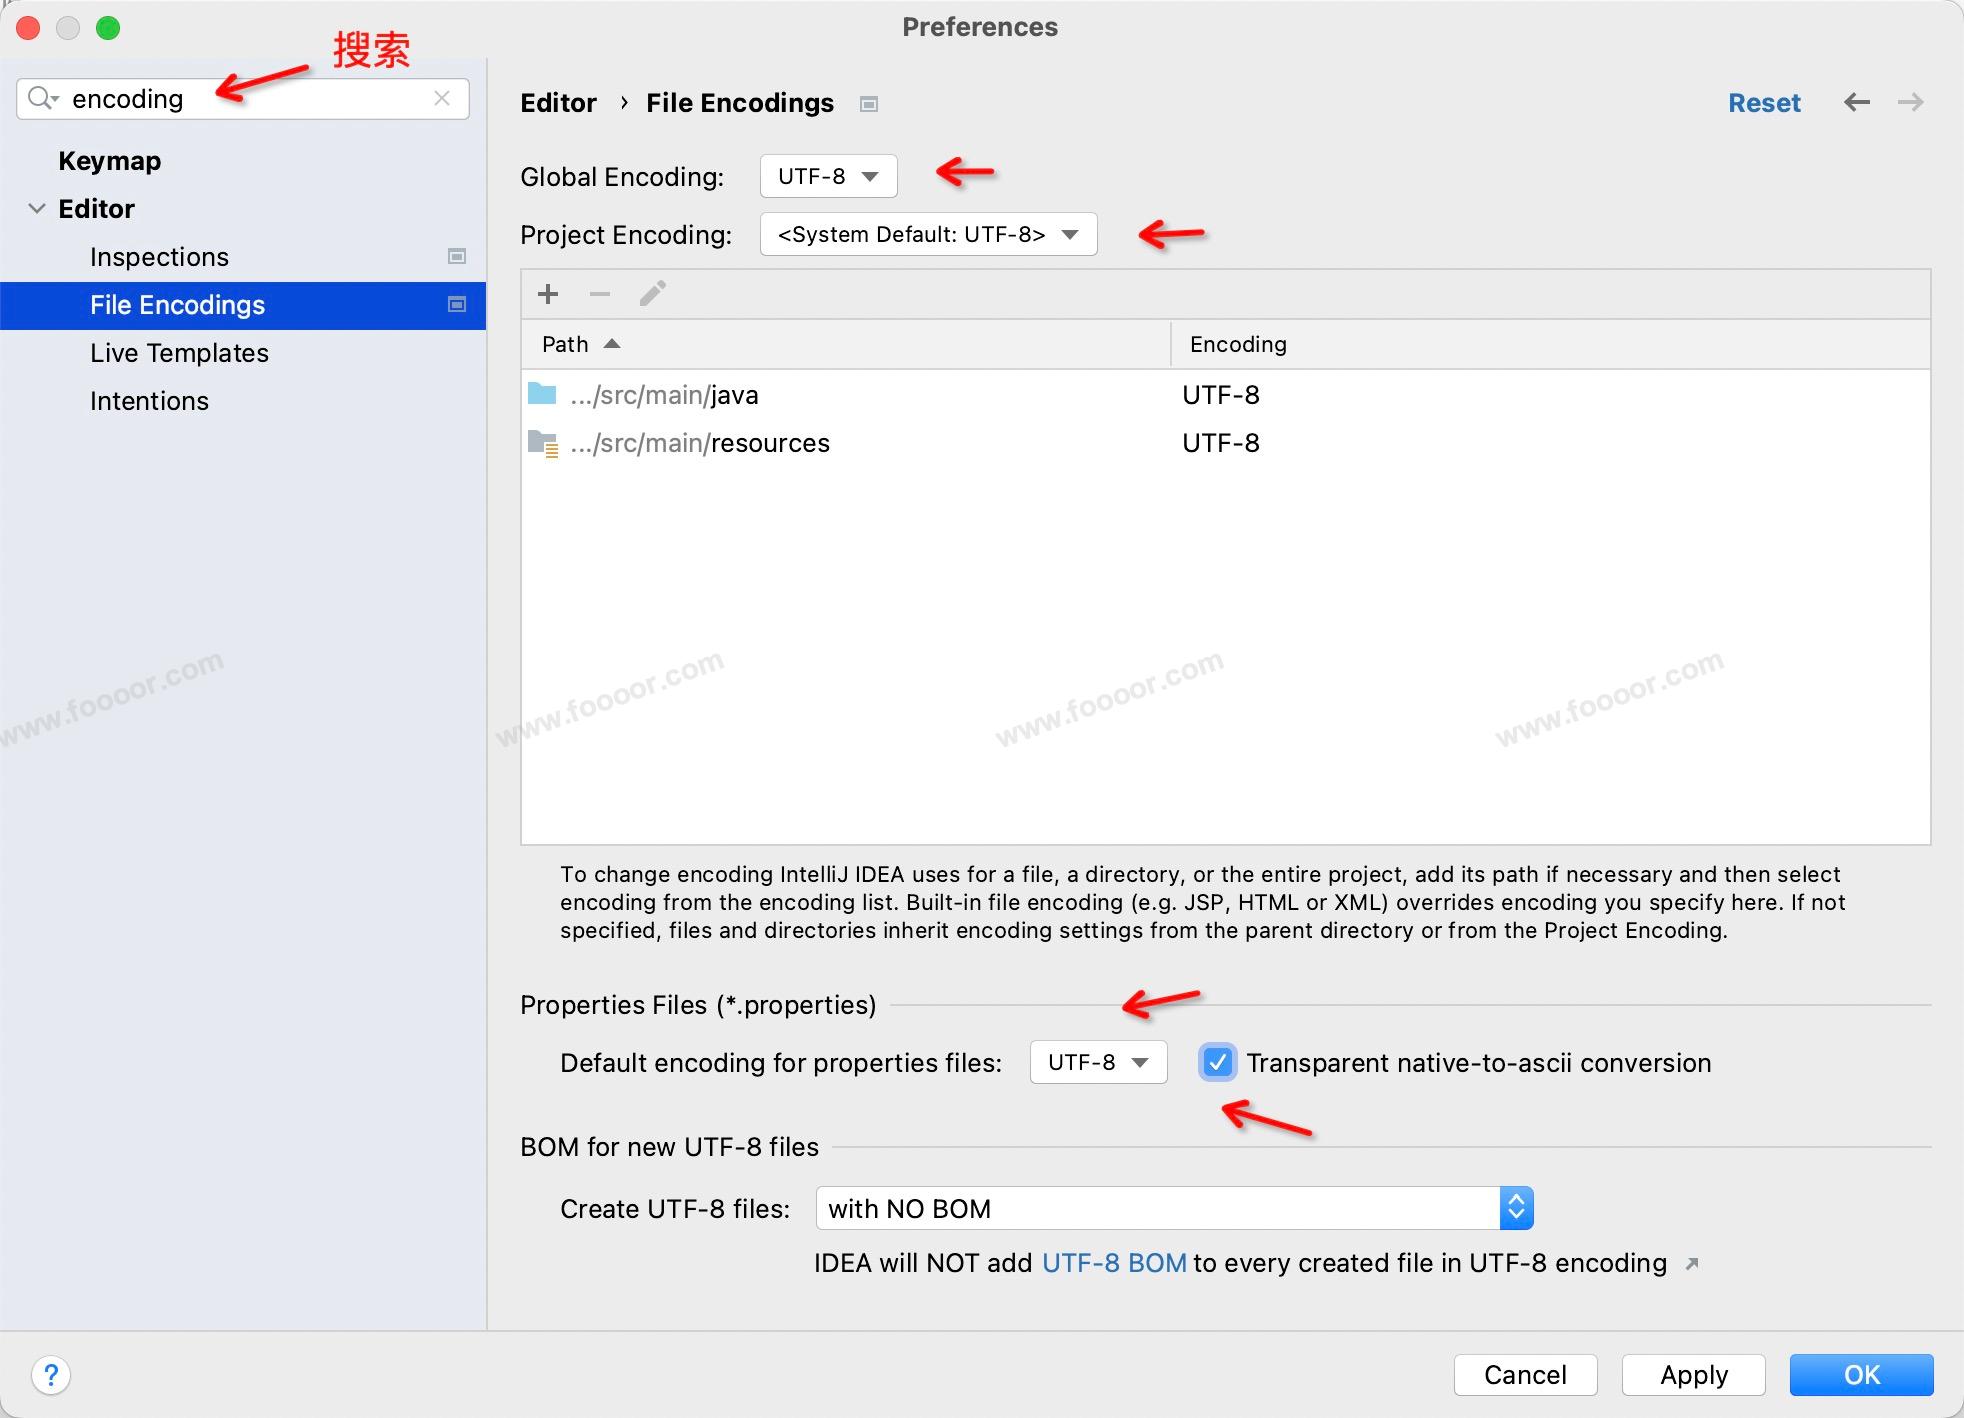
5.7 乱码
如果配置文件中有中文,出现乱码问题,则需要设置项目文件的字符编码。
如下:
5.8 @ConfigurationProperties注入Bean
上面将配置文件中的配置注入到Bean中,只能一个个绑定。
如果想将一组配置与Bean进行绑定,可以使用 @ConfigurationProperties 注解。
举个栗子:
1 编辑配置文件
编辑 application.yaml 内容如下:
yaml
person:
  name: doubi
  age: 18
  isBoss: false
  birthday: 2024/06/01
  maps: {key1: value1, key2: value2}
  books:
    - Java
    - SpringBoot
  dog:
    name: 大黄
    age: 2
2 创建Bean
现在想将上面的配置自动注入到 Person 类中,首先新建一个 Person 类:
添加 @Component 和 @ConfigurationProperties 注解。
java
package com.doubibiji.hellospringboot.domain;

import org.springframework.boot.context.properties.ConfigurationProperties;
import org.springframework.stereotype.Component;

import java.util.Date;
import java.util.List;
import java.util.Map;

@Component  // 只有这个组件是容器中的组件,才能使用容器提供的@ConfigurationProperties功能,所以需要添加@Component注解
@ConfigurationProperties(prefix = "person")  // prefix指定配置文件中的属性进行映射
public class Person {

    private String name;
    private int age;
    private boolean isBoss;
    private Date birthday;
    private Map<String, String> maps;
    private List<String> books;
    private Dog dog;

    // ...getters and setters

    @Override
    public String toString() {
        return "Person{" +
                "name='" + name + '\'' +
                ", age=" + age +
                ", isBoss=" + isBoss +
                ", birthday=" + birthday +
                ", maps=" + maps +
                ", books=" + books +
                ", dog=" + dog +
                '}';
    }
}
上面有一个 Dog 类子属性,所以还需要新建一个 Dog 类:
Dog 类不需要添加注解。
java
package com.doubibiji.hellospringboot.domain;

public class Dog {
    private String name;
    private int age;

    // ...getters and setters

    @Override
    public String toString() {
        return "Dog{" +
                "name='" + name + '\'' +
                ", age=" + age +
                '}';
    }
}
3 测试
HelloSpringbootApplicationTests.java :
Person 类刚才添加了 @Component 注解,所以 Person 类对象现在是在 Spring 容器中,所以可以使用 @Autowired 注解,直接将 Person 对象注入到测试类。
java
package com.doubibiji.hellospringboot;

import com.doubibiji.hellospringboot.domain.Person;
import org.junit.jupiter.api.Test;
import org.springframework.beans.factory.annotation.Autowired;
import org.springframework.boot.test.context.SpringBootTest;

@SpringBootTest
class HelloSpringbootApplicationTests {

	@Autowired
	private Person person;

	@Test
	void contextLoads() {
		System.out.println(person);
	}
}
执行结果:
Person{name='doubi', age=18, isBoss=false, birthday=Sat Jun 01 00:00:00 CST 2024, maps={key1=value1, key2=value2}, books=[Java, SpringBoot], dog=Dog{name='大黄', age=2}}可以看到 Person 对象使用配置文件自动注入了值。使用 @ConfigurationProperties 进行Bean与配置文件中属性绑定的时候,支持松散绑定(松散语法),例如在配置文件中配置last-name、last_name、lastName,都能与类中的属性last-name、last_name、lastName 进行对应。
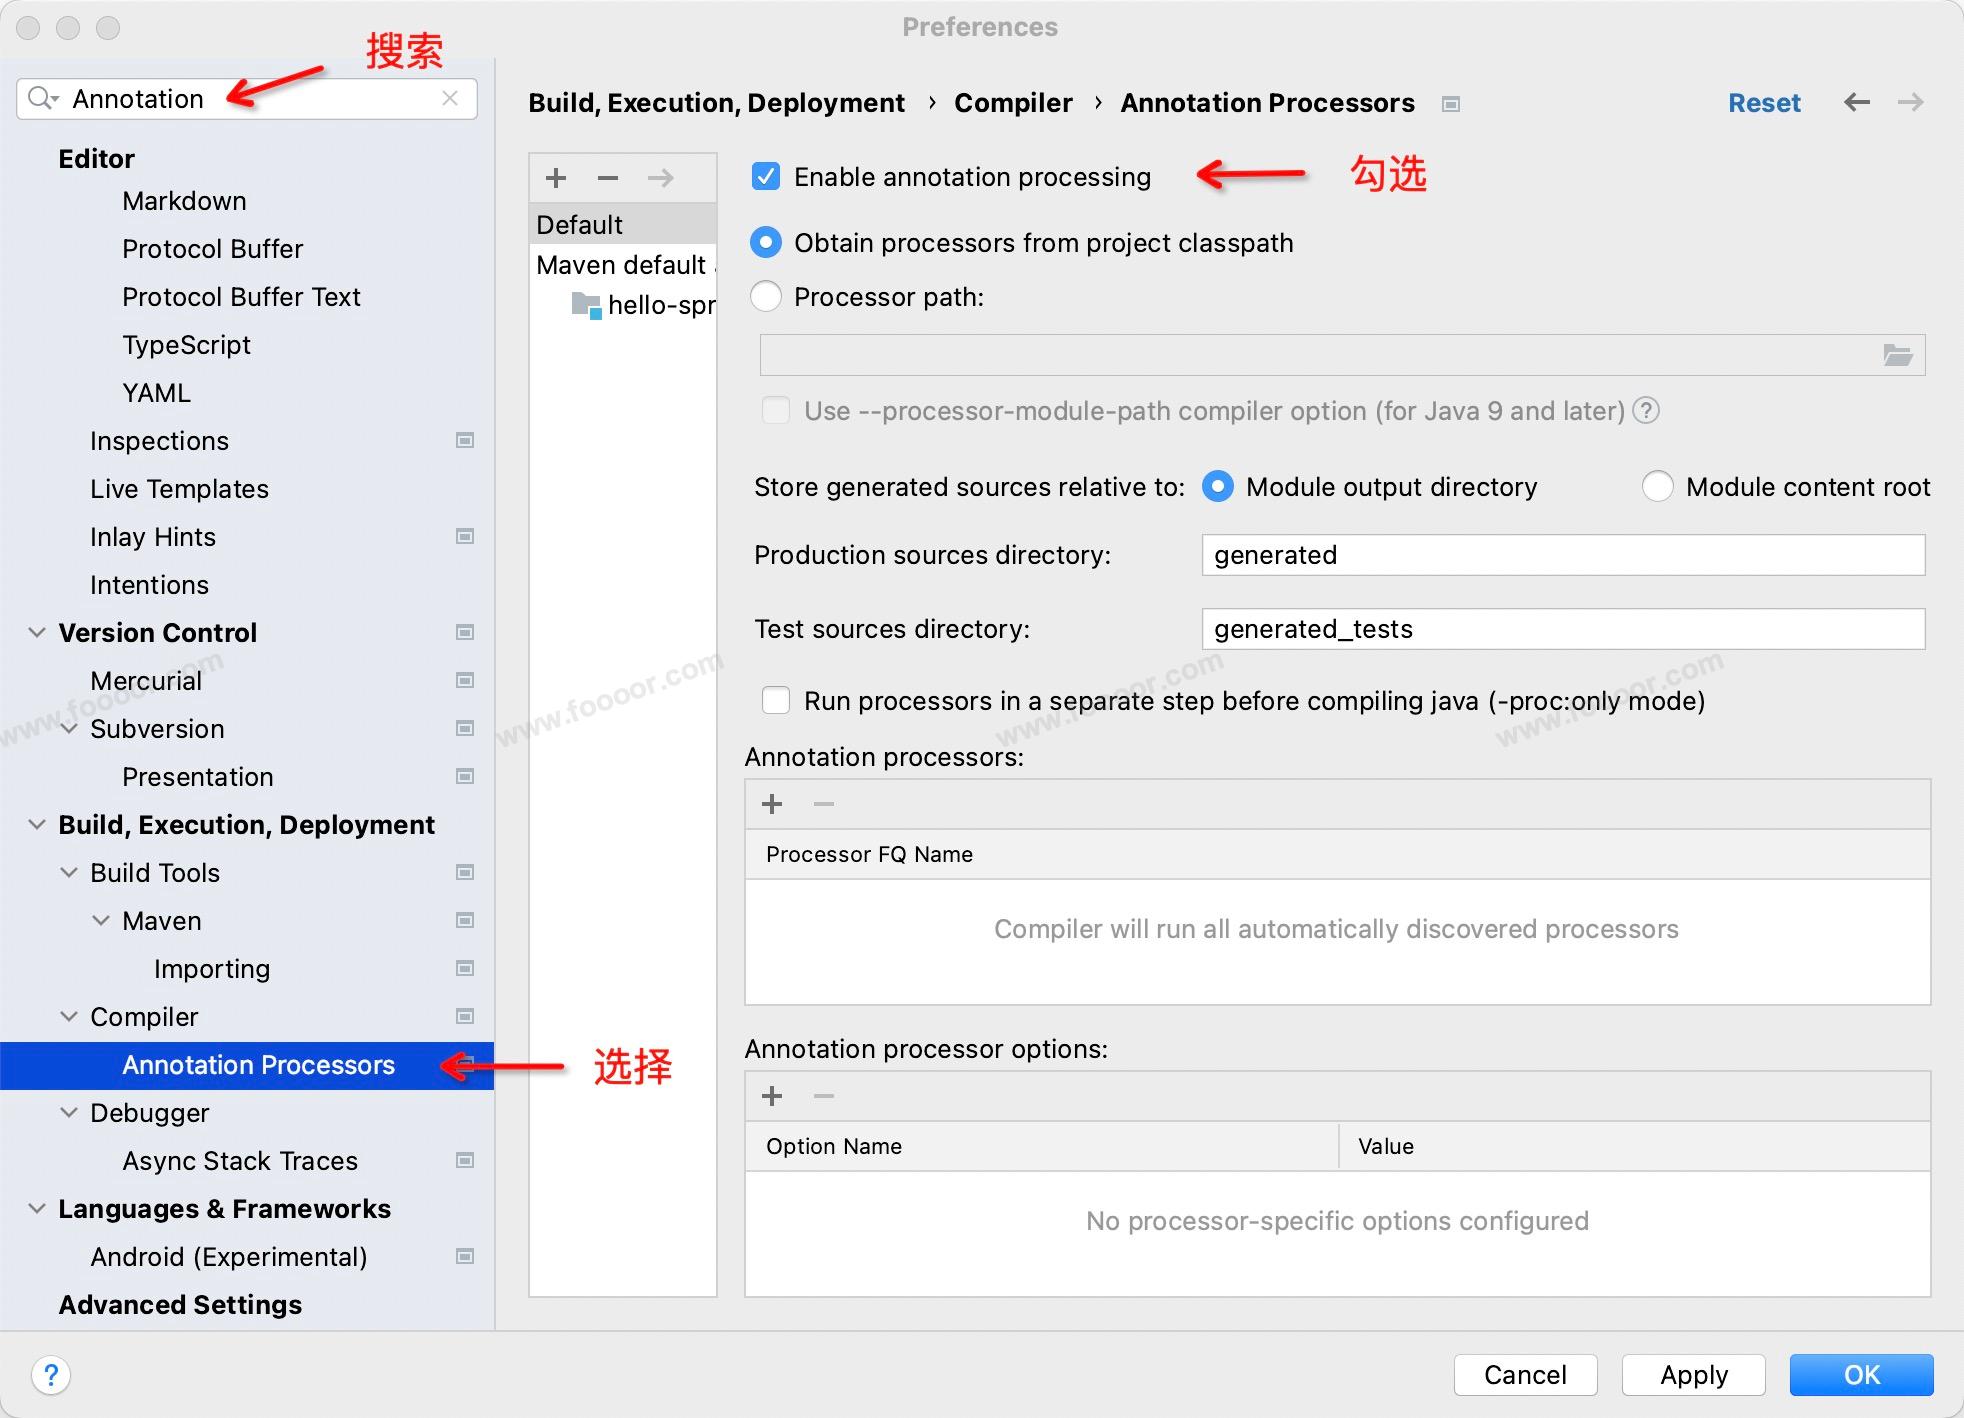
5.9 Annotation Processor
上面再给类添加 @ConfigurationProperties 注解的时候,IDEA会报一个提示:
Spring Boot Configuration Annotation Processor not configured .
可以在项目的 pom.xml 添加如下依赖:
xml
<!-- IDEA配置文件提示 -->
<dependency>
  <groupId>org.springframework.boot</groupId>
  <artifactId>spring-boot-configuration-processor</artifactId>
  <!-- 不传递依赖 -->
  <optional>true</optional>
</dependency>
上面是添加配置文件处理器,这样编辑与Bean对应的配置文件中的配置时,会有提示。
重新加载一下 maven 配置,然后在IDEA中启用 Enable annotation processing。
5.10 配置文件占位符
在配置文件中,可以使用占位符和随机数生成
1 属性配置占位符
举个栗子:
yaml
app.name=MyApp
app.description=${app.name} is a Spring Boot application
可以在配置文件中引用前面配置过的属性,还可以使用 ${app.name:默认值} 来指定找不到属性值是的默认值。
注意上面的只是占位符,只能引用其他属性,不是SpEL表达式,不能进行运算。
2 随机值
如果想在配置文件中生成随机值,可以使用下面的方式:
yaml
myapp:
  random-int: ${random.int}  # 生成一个任意的整数
  random-int-range: ${random.int(1000,9999)}  # 生成一个在min和max之间的整数。
  random-long: ${random.long}  # 生成一个任意的长整数
  random-uuid: ${random.uuid}  # 生成一个随机的 UUID
  random-string: ${random.value} # 生成一个随机的字符串
5.11 自定义配置文件
上面使用 @ConfigurationProperties(prefix = "person") 进行配置文件注入的时候,默认是从全局配置文件中获取值,如果所有的东西都配置在 SpringBoot 全局文件 application-*.yaml 中,可能导致全局配置文件臃肿,所以可以将一些非 SpringBoot 相关的配置写在其他配置文件中。
1 创建配置文件
现在我们在 resources 目录下新建 person.properties 文件,将之前 person 的配置放到该文件中:
properties
person.name=doubi
person.age=18
person.isBoss=false
person.birthday=2024/06/01
person.maps.key1=value1
person.maps.key2=value2
person.books=Java,SpringBoot
person.dog.name=大黄
person.dog.age=2
注意,只支持 properties 文件,不能使用 yaml 文件。
2 创建Bean
此时就不能单独使用 @ConfigurationProperties 注解了,因为默认是从 SpringBoot 全局配置文件中查找,此时就需要搭配@PropertySource 注解了,读取指定的配置文件。
java
package com.doubibiji.hellospringboot.domain;

import org.springframework.boot.context.properties.ConfigurationProperties;
import org.springframework.context.annotation.PropertySource;
import org.springframework.stereotype.Component;

import java.util.Date;
import java.util.List;
import java.util.Map;

@Component
@PropertySource(value = {"classpath:person.properties"})
@ConfigurationProperties(prefix = "person")
public class Person {
    private String name;
    private int age;
    private boolean isBoss;
    private Date birthday;
    private Map<String, String> maps;
    private List<String> books;
    private Dog dog;

    // ...getters and setters

    @Override
    public String toString() {
        return "Person{" +
                "name='" + name + '\'' +
                ", age=" + age +
                ", isBoss=" + isBoss +
                ", birthday=" + birthday +
                ", maps=" + maps +
                ", books=" + books +
                ", dog=" + dog +
                '}';
    }
}
@PropertySource(value = {"classpath:person.properties"}) 加载classpath下的 person.properties 文件。 该注解的value可以配置成数组的形式,加载多个配置文件。
3 测试
编写一个测试类进行测试。
Person 类刚才添加了 @Component 注解,所以 Person 类对象现在是在 Spring 容器中,所以可以使用 @Autowired 注解,直接将 Person 对象注入到测试类。
HelloSpringbootApplicationTests.java :
java
package com.doubibiji.hellospringboot;

import com.doubibiji.hellospringboot.domain.Person;
import org.junit.jupiter.api.Test;
import org.springframework.beans.factory.annotation.Autowired;
import org.springframework.boot.test.context.SpringBootTest;

@SpringBootTest
class HelloSpringbootApplicationTests {

	@Autowired
	private Person person;

	@Test
	void contextLoads() {
		System.out.println(person);
	}
}
执行结果:
Person{name='doubi', age=18, isBoss=false, birthday=Sat Jun 01 00:00:00 CST 2024, maps={key1=value1, key2=value2}, books=[Java, SpringBoot], dog=Dog{name='大黄', age=2}}