Appearance
SpringBoot3教程 - 18 SpringBoot集成Springdoc
当前主流的开发模式是前后端分离,这样前端在开发的时候想要知道后端接口的信息,就需要一个 API 文档,由于开发任务繁重,而且接口随时可能更新,如果手动来编写或更新 API 文档肯定累死人,所以有一个自动生成服务器接口文档的工具就很有必要了。
Swagger就是干这个的,不仅可以查看接口的信息,还可以在线测试接口。
但是使用 SpringBoot3,Swagger的支持有问题,所以我们可以使用 Spring 官方的推出的 springdoc-openapi。Springdoc 使用 OpenAPI 3.0 规范,这与 Swagger 使用的 OpenAPI 规范一致。实际上,Springdoc 生成的文档可以直接用于 Swagger UI 展示。
Springdoc官网:https://springdoc.org/
下面介绍一下如何在 SpringBoot项目中集成Springdoc。
18.1 创建SpringBoot项目
创建项目,不多说了。
18.2 添加依赖
在项目的 pom.xml 文件中添加如下依赖:
xml
<!-- springdoc -->
<dependency>
  <groupId>org.springdoc</groupId>
  <artifactId>springdoc-openapi-starter-webmvc-ui</artifactId>
  <version>2.5.0</version>
</dependency>
18.3 配置application.yml
在 application.yaml 中添加如下配置,生产环境不应该再暴漏 API 文档了,所以可以在 application-dev.yaml 文件中进行配置,在开发环境中使用就可以了。
yaml
springdoc:
  swagger-ui:
    path: /api-ui
    enabled: true
  api-docs:
    enabled: true
    path: /api-json
    groups:
      enabled: true
  # 配置需要生成接口文档的扫描包
  packages-to-scan: com.doubibiji.hellospringboot.controller
后面可以通过 /api-ui 和 /api-json 来访问 API 接口页面。
18.4 配置文档信息
在 com.doubibiji.hellospringboot.config 包下新建一个 Springdoc 的配置类,对接口文档的一些信息进行说明,同时对接口进行分组。
配置如下:
java
package com.doubibiji.hellospringboot.config;

import io.swagger.v3.oas.models.ExternalDocumentation;
import io.swagger.v3.oas.models.OpenAPI;
import io.swagger.v3.oas.models.info.Contact;
import io.swagger.v3.oas.models.info.Info;
import io.swagger.v3.oas.models.info.License;
import org.springdoc.core.models.GroupedOpenApi;
import org.springframework.context.annotation.Bean;
import org.springframework.context.annotation.Configuration;

@Configuration
public class SpringdocConfig {

    @Bean
    public GroupedOpenApi userApi() {
        return GroupedOpenApi.builder()
                .group("user")
                .pathsToMatch("/user/**")  // /user/**的接口分为一组
                .build();
    }
    @Bean
    public GroupedOpenApi orderApi() {
        return GroupedOpenApi.builder()
                .group("order")
                .pathsToMatch("/order/**")  // /order/**的接口分为一组
                .build();
    }

    @Bean
    public OpenAPI openAPI() {
        return new OpenAPI()
                .info(apiInfo())
                .externalDocs(new ExternalDocumentation()
                        .description("SpringDoc文档")
                        .url("https://springdoc.org/"));
    }

    private Info apiInfo() {
        return new Info()
                .title("接口文档标题")
                .description("SpringBoot3 集成 Springdoc")
                .version("1.0.0")
                .contact(new Contact()
                        .name("逗比团队")
                        .url("www.doubibiji.com")
                )
                .license(new License()
                        .name("Apache 2.0")
                        .url("http://www.apache.org/licenses/LICENSE-2.0.txt")
                );
    }

}
18.5 排除拦截
在我们的项目中,可能会配置拦截器,拦截除登录注册外的请求,所以需要针对 Springdoc 相关的请求排除在外,否则访问会被拦截,导致无法访问。
如果你的项目中有拦截器,一定要注意一下拦截配置。
假设我有一个拦截器 ,这里拦截所有的请求:
java
package com.doubibiji.hellospringboot.interceptor;

import jakarta.servlet.http.HttpServletRequest;
import jakarta.servlet.http.HttpServletResponse;
import lombok.extern.slf4j.Slf4j;
import org.springframework.stereotype.Component;
import org.springframework.web.servlet.HandlerInterceptor;

@Slf4j
@Component
public class RequestAuthorizationInterceptor implements HandlerInterceptor {

    @Override
    public boolean preHandle(HttpServletRequest request, HttpServletResponse response, Object handler) throws Exception {

        String servletPath = request.getServletPath();
        log.info("request path:{}", servletPath);

        // 拦截所有请求
        throw new RuntimeException();
    }
}
配置拦截器,不拦截 Springdoc 相关的请求:
java
package com.doubibiji.hellospringboot.config;

import com.doubibiji.hellospringboot.interceptor.RequestAuthorizationInterceptor;
import org.springframework.beans.factory.annotation.Autowired;
import org.springframework.context.annotation.Configuration;
import org.springframework.web.servlet.config.annotation.InterceptorRegistry;
import org.springframework.web.servlet.config.annotation.WebMvcConfigurer;

import java.util.ArrayList;
import java.util.List;

@Configuration
public class WebConfig implements WebMvcConfigurer {

    @Autowired
    private RequestAuthorizationInterceptor requestAuthorizationInterceptor;

    @Override
    public void addInterceptors(InterceptorRegistry registry) {

        List<String> excludeInterceptorPath = new ArrayList<>();
        // API文档访问接口
        excludeInterceptorPath.add("/api-ui/**");
        excludeInterceptorPath.add("/api-json/**");

        // swagger接口
        excludeInterceptorPath.add("/swagger-ui.html");
        excludeInterceptorPath.add("/swagger-ui/**");
        excludeInterceptorPath.add("/swagger-resources");
        excludeInterceptorPath.add("/swagger-resources/**");
        excludeInterceptorPath.add("/v3/api-docs/**");
        excludeInterceptorPath.add("/docs");

        // 拦截器,排除拦截
        registry.addInterceptor(requestAuthorizationInterceptor)
                .addPathPatterns("/**").excludePathPatterns(excludeInterceptorPath);

    }
}
18.6 编写接口
下面编写接口,在接口、参数、返回值相关的类型添加相关的注解,用于生成 API 文档。
UserController:
java
package com.doubibiji.hellospringboot.controller;

import com.doubibiji.hellospringboot.vo.UserVo;
import io.swagger.v3.oas.annotations.Hidden;
import io.swagger.v3.oas.annotations.Operation;
import io.swagger.v3.oas.annotations.Parameter;
import io.swagger.v3.oas.annotations.Parameters;
import io.swagger.v3.oas.annotations.tags.Tag;
import org.springframework.web.bind.annotation.*;

@Tag(name = "用户管理", description = "用户管理相关接口")
@RestController
@RequestMapping("/user")
public class UserController {

    // 接口描述
    @Operation(summary = "根据ID获取用户信息")
    @GetMapping("/{userId}")
    public UserVo getUserById(@Parameter(name="userId", required = true, description = "用户的唯一ID") @PathVariable String userId) {
        return new UserVo("user_001", "doubi", "逗比");
    }

    /**
     * 多个参数也可以这样写
     */
    @Operation(summary = "修改用户信息")
    // 参数描述
    @Parameters({
            @Parameter(name = "userId", required = true, description = "用户ID"),
            @Parameter(name = "username", required = true, description = "用户名"),
            @Parameter(name = "nickname", description = "昵称")
    })
    @PutMapping("/{userId}")
    public UserVo saveUser(@PathVariable String userId, String username, String nickname) {
        return new UserVo(userId, username, nickname);
    }

    /**
     * 不想在API中暴漏接口,可以通过@Hidden隐藏
     * 不影响接口访问
     */
    @Hidden
    @GetMapping(value = "/test")
    public String test() {
        return "Hello!";
    }
}
OrderController:
java
package com.doubibiji.hellospringboot.controller;

import com.doubibiji.hellospringboot.vo.OrderVo;
import io.swagger.v3.oas.annotations.Operation;
import io.swagger.v3.oas.annotations.tags.Tag;
import org.springframework.web.bind.annotation.GetMapping;
import org.springframework.web.bind.annotation.RequestMapping;
import org.springframework.web.bind.annotation.RestController;
import java.util.ArrayList;
import java.util.List;

@Tag(name = "订单管理", description = "订单管理相关接口")
@RestController
@RequestMapping("/order")
public class OrderController {

    @Operation(summary = "获取订单列表")
    @GetMapping("/list")
    public List<OrderVo> getOrderList() {
        List<OrderVo> orderVoList = new ArrayList<>();
        orderVoList.add(new OrderVo("order_001", "order_2024062601010101"));
        orderVoList.add(new OrderVo("order_001", "order_2024062601010102"));
        return orderVoList;
    }
}
返回的实体类UserVo:
java
package com.doubibiji.hellospringboot.vo;

import io.swagger.v3.oas.annotations.media.Schema;
import lombok.AllArgsConstructor;
import lombok.Data;

@Data
@AllArgsConstructor
@Schema(description= "用户信息")
public class UserVo {

    @Schema(description = "主键ID")
    private String id;

    @Schema(description = "用户名")
    private String username;

    @Schema(description = "昵称", example = "我是逗比")
    private String nickname;
}
返回的实体类OrderVo:
java
package com.doubibiji.hellospringboot.vo;
import io.swagger.v3.oas.annotations.media.Schema;
import lombok.AllArgsConstructor;
import lombok.Data;
@Data
@AllArgsConstructor
@Schema(description= "订单信息")
public class OrderVo {
@Schema(description = "主键ID")
private String id;
@Schema(description = "订单号")
private String orderNumber;
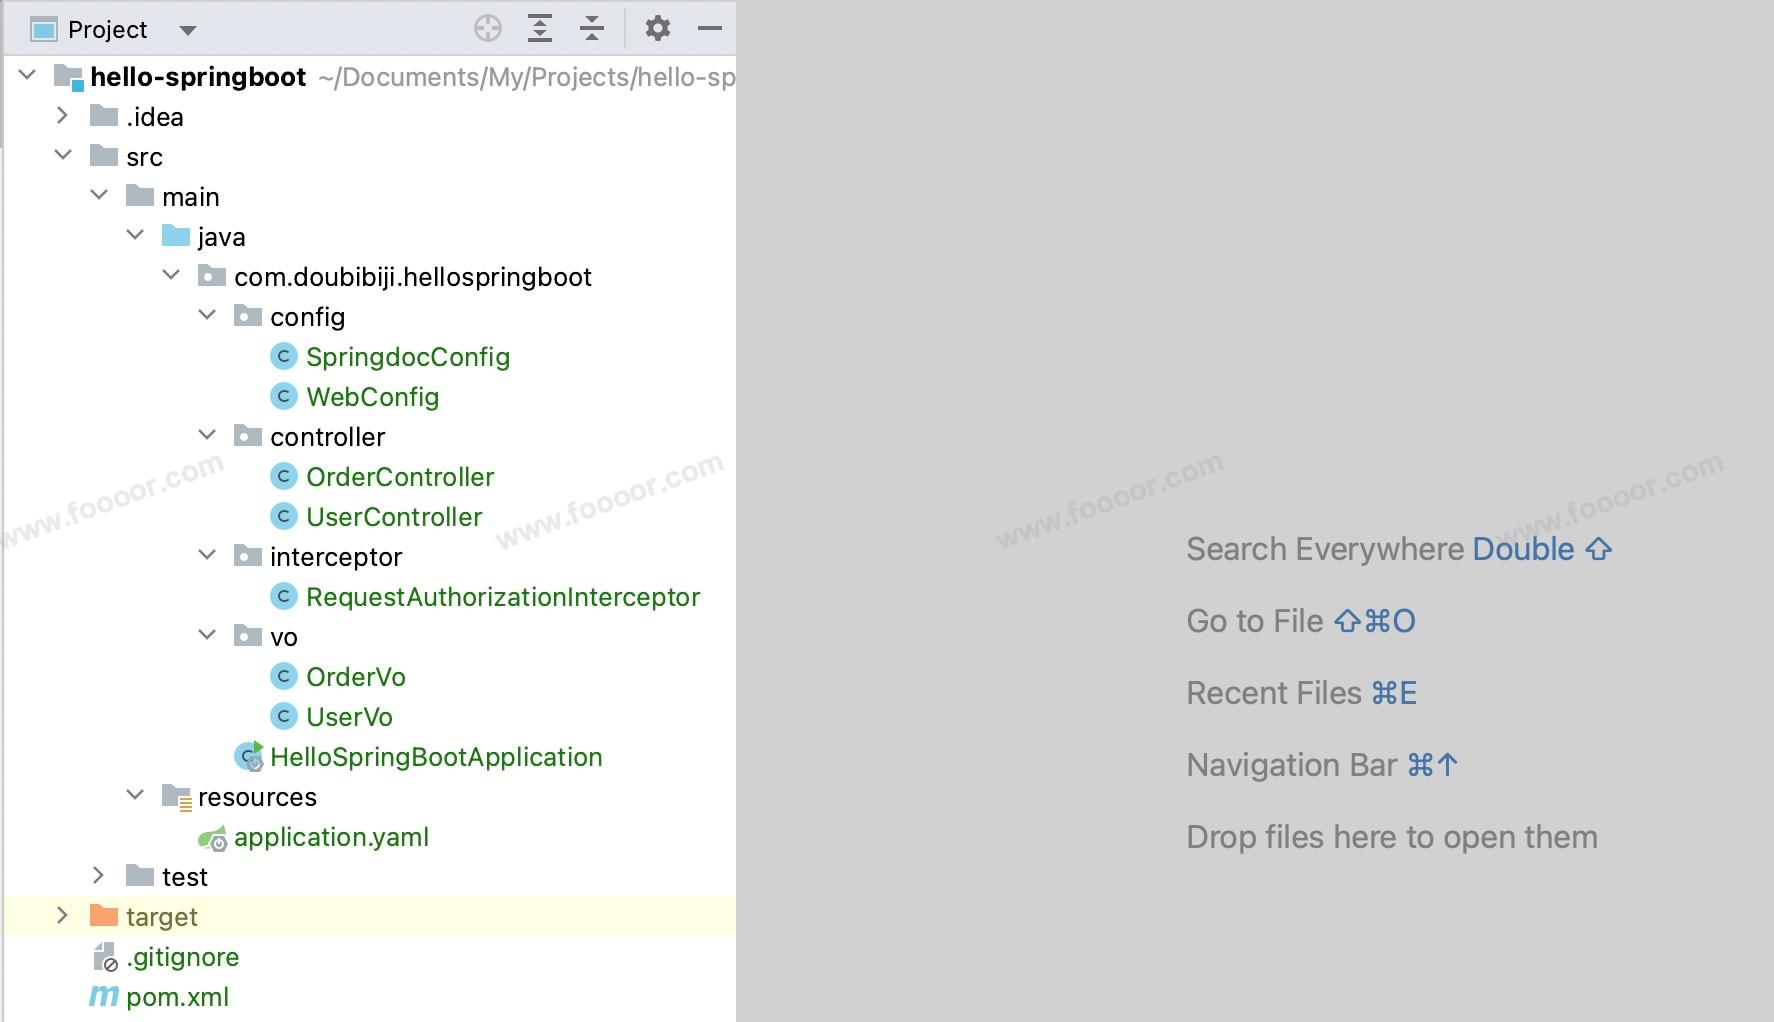
}整个项目的结构:
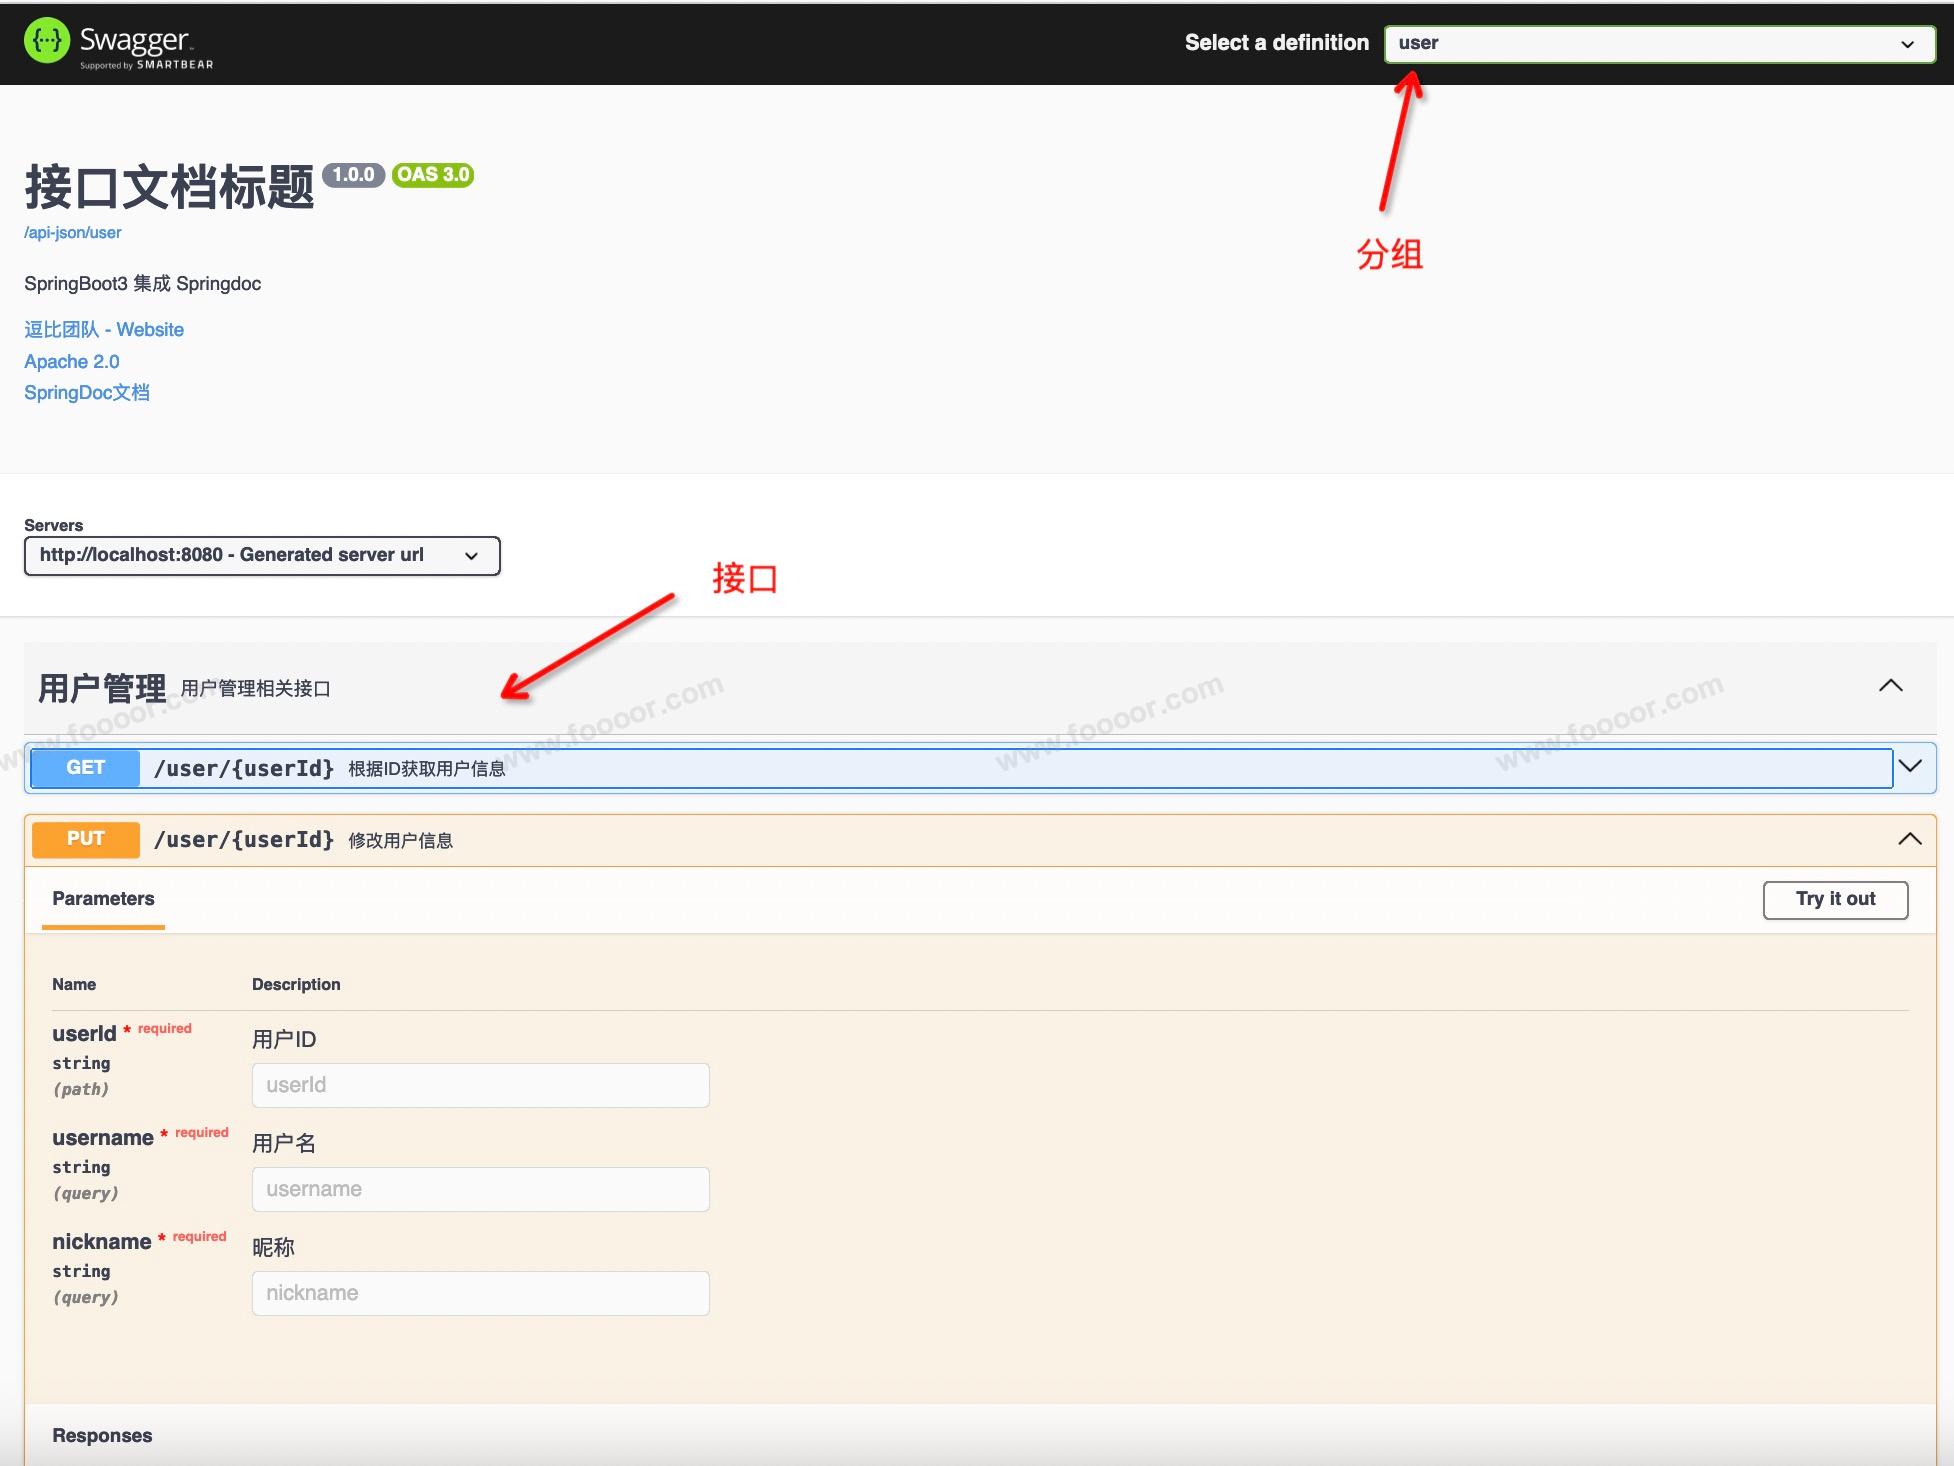
18.7 访问测试
访问 API 文档的页面,最终的效果如下。
访问:http://localhost:8080/api-ui
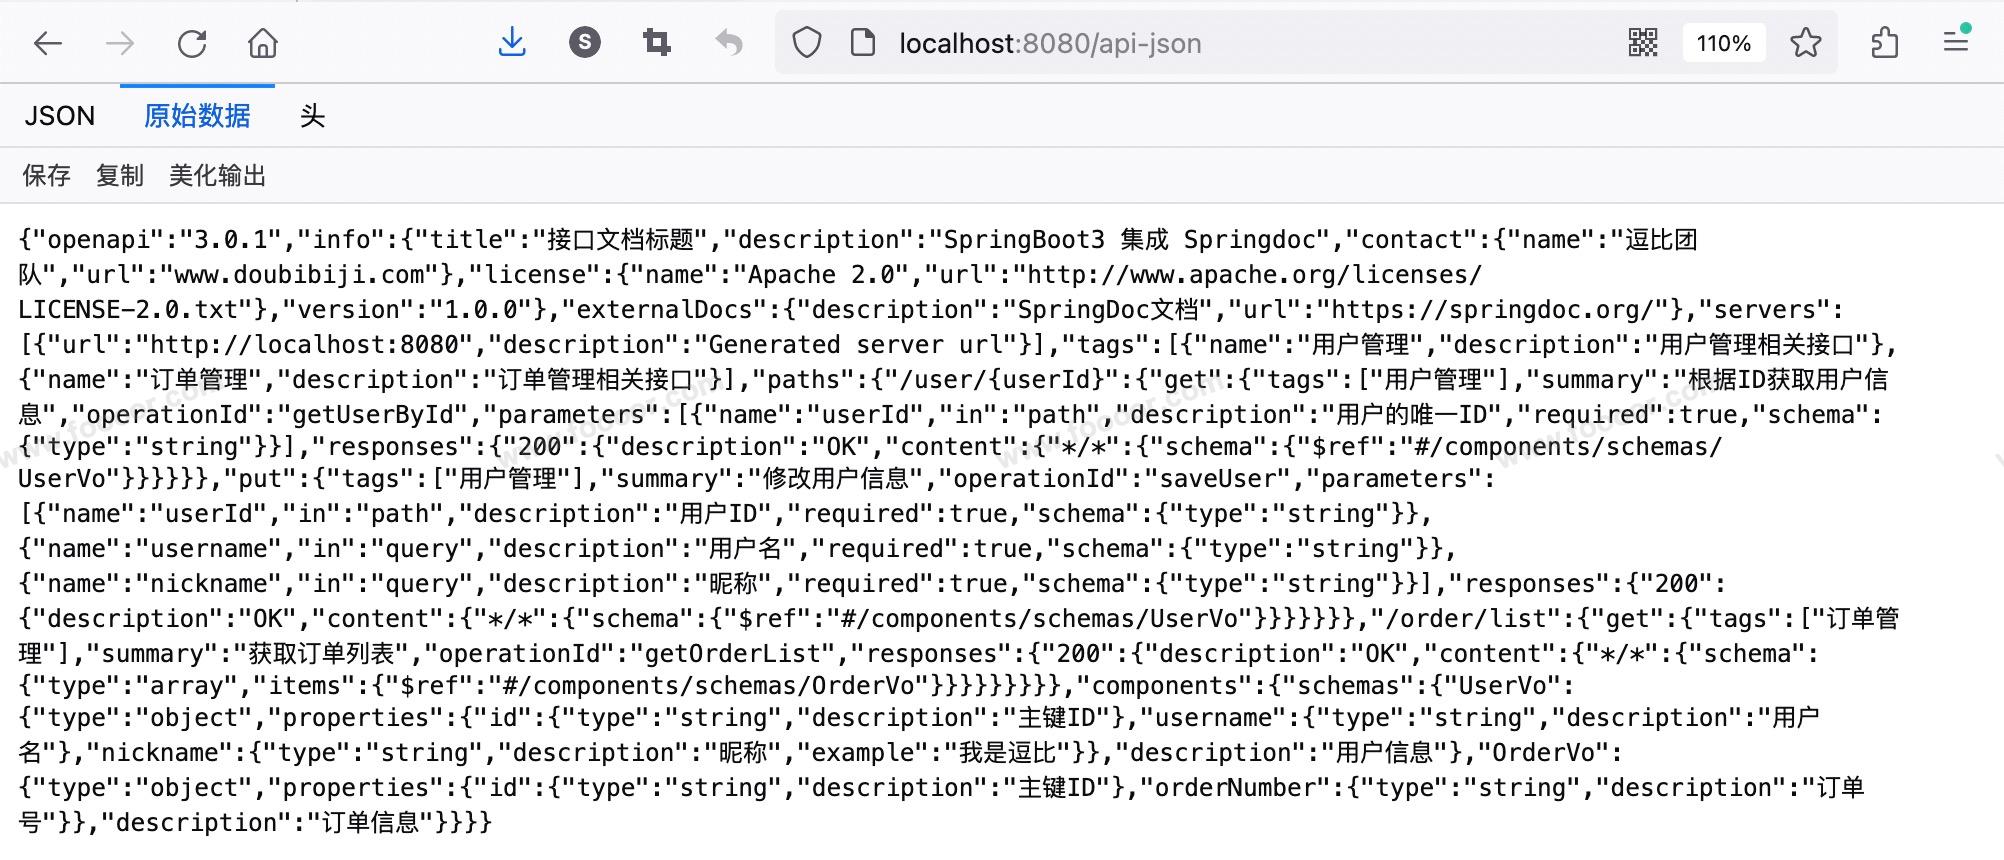
访问:http://localhost:8080/api-json
Springdoc 注解的一些使用,这里就不详细介绍了,大家可以百度一下。
内容未完......